A Paper-and-String Gift Tag for a Rainy Afternoon
Make a paper-and-string gift tag with household materials, choosing a useful size, legible lettering and a tidy finish that suits the parcel.
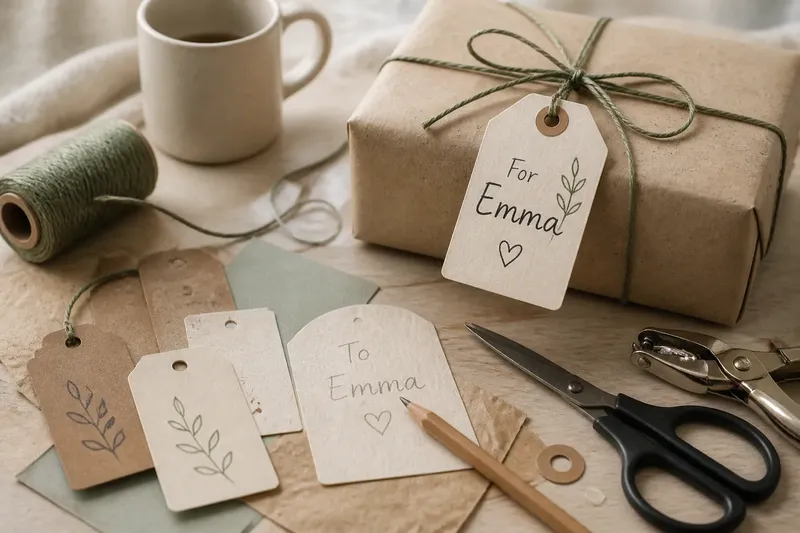
The most common mistake with a paper-and-string gift tag is cutting it before deciding what it needs to say. The result is often a cramped name, a hole too close to the edge or a tag so large it competes with the wrapping. A little planning turns scrap paper and string into a small, considered part of the gift.
This paper-and-string gift tag needs no special equipment: use a pencil, scissors, a ruler if handy, a hole punch if available, and any ordinary paper that will hold a name without tearing. The choices below help you make it fit the parcel rather than follow a fixed template.
1. What should the tag say?
Decide on the wording before choosing the tag’s size. A recipient’s name may be all that is needed. Add a brief note only if you have something specific to say; a longer message belongs on a card, where it can be read without turning the parcel over.
Write a draft on scrap paper. Check how many lines it takes and leave room around the words. If you want to include a sender’s name, account for that now rather than squeezing it into a corner at the end. Keeping the message short also makes hand lettering easier to read.
A pencil draft is useful even if the finished writing will be in pen. It shows whether the words sit comfortably on the paper and helps you judge the space needed. If the tag will hang from a narrow ribbon or string loop, keep the writing away from the point where the loop crosses the tag.
2. How large should the tag be?
Let the parcel set the scale. A small box can take a compact tag with a name on one line. A larger parcel has room for a broader shape or an extra line, though a tag should still feel like an accent rather than a second piece of wrapping.
Measure with a ruler, or use the width of your fingers as a rough guide if one is not nearby. Sketch the outline on scrap paper and place the draft wording inside it. This simple paper template lets you adjust the proportions before cutting into the sheet you want to use.
Rectangles are straightforward to trim and give writing a clear baseline. A square can look balanced with a short name. A tapered top or rounded corners soften the shape, but avoid narrow shoulders where the string hole might weaken the paper. For a tiny tag, fewer words and larger lettering usually read better than a smaller version of a full note.
3. Which paper will hold its shape?
Choose paper that is firm enough to hang without folding over, but not so stiff that it is awkward to cut or punch. A piece from a paper shopping bag, a blank side of a greeting card, or thicker drawing paper can all work. Thin wrapping paper is more likely to crease and tear around the hole, so it may need a backing layer.
If you are layering paper, cut two matching shapes and attach them with a small amount of glue. Keep adhesive away from the area that will be punched, and let it dry before making the hole. A plain reverse side is handy for writing a note, while patterned paper may call for a simple name on the front.
Check the surface before lettering. Glossy coatings can make ordinary pen ink smear or sit on top of the paper. If you are unsure, try the pen on an offcut and give it a moment to dry. Pencil is a quieter choice on many surfaces, though its marks may rub during handling.
4. How can you letter it neatly?
Use a light pencil to mark a writing line, then write at a comfortable pace. A ruler can help make the line level; a folded scrap of paper also works as a guide. Keep the letters large enough to read at arm’s length, especially if the tag will hang from a bag or basket.
Choose one lettering style and keep it consistent. Plain printed capitals are easy to control, while ordinary joined-up handwriting takes less room. Avoid adding flourishes until the name is finished: a decorative curl can crowd the edge or obscure a letter.
If you have sketched guidelines, erase them gently after the ink is dry. Test the eraser on a spare corner first, especially on delicate or coloured paper. A light pencil line left in place is preferable to a rubbed patch that roughens the surface.
5. Where should the hole go?
Leave enough paper between the hole and the top edge to support the string. A hole punch makes a clean opening, but a sharpened pencil can mark a small opening in forgiving paper. Work on a firm surface and avoid forcing a blunt object through stiff card; choose another paper or a suitable punch instead.
Before punching, place the tag beside the parcel and imagine how it will hang. A hole near the centre gives a straightforward loop. A hole near one corner lets the tag sit at an angle, but the paper needs enough material around it to avoid tearing as the string shifts.
If the paper feels fragile, reinforce the hole with a small paper ring on the reverse. Cut the ring from a scrap, make its centre opening, and attach it flat around the tag’s hole. Keep the reinforcement neat and light so it supports the opening without making the top bulky.
6. What string gives it a tidy finish?
Choose string that passes through the hole without scraping the edges. Cotton kitchen string, parcel twine or a narrow ribbon can suit the paper; thick cord may overwhelm a small tag. A contrasting colour can make the loop noticeable, while a similar shade keeps attention on the lettering.
Cut enough string to tie the tag to the parcel without pulling it tight. Thread it through the hole, bring the ends together and tie a simple knot or bow around the parcel’s ribbon, handle or gathered paper. If the tag needs to be removed easily, tie it to a ribbon rather than directly around the wrapping.
Trim uneven ends after tying. Leave a little tail so the knot does not look pinched, and check that the tag faces the right way when the parcel is set down. The tag should hang freely, not drag across a rough surface or twist behind the parcel.
What questions help before you finish?
Can I make a tag without a hole punch?
Yes. Mark a small opening with a pencil point in paper that is easy to pierce, supporting the tag on scrap card. If the sheet resists or starts to split, switch to thinner paper or use a hole punch rather than forcing it.
What can I use if I have no parcel string?
Try a narrow strip of paper folded lengthways, a spare ribbon, or thread thick enough to sit comfortably through the hole. Choose a tie that will not cut into the paper when knotted, and keep the loop loose enough for the tag to move.
How do I keep the writing from smearing?
Test the pen on an offcut of the same paper and allow the ink to dry before handling it. If it stays wet or feathers into the surface, use pencil or another pen that suits that paper.
Can the tag be reused?
It can be reused if the paper remains firm and the writing can be removed or covered neatly. Leave the back blank for a later note, and tie the string in a way that can be untied without tearing the hole.
7. How can you judge the finished tag?
Imagine you are wrapping a small book in plain brown paper. You draft the recipient’s name on scrap, find that it needs one line, then cut a simple rectangle from a firm paper bag. A pencil guideline keeps the lettering level; a punched hole and cotton string let the tag hang from the parcel ribbon. The observable check is modest but useful: the name can be read, the tag hangs face-up and the paper stays flat around its hole.
Before attaching your own tag, make the same quiet checks: can the recipient’s name be read without lifting it, does the tie sit securely, and does the paper still look clean at the edges? Adjust the string or trim a stray corner if needed. A well-made paper-and-string gift tag is not elaborate; its neatness comes from giving the words, paper and loop enough room to work together.